
This article is a step-to-step guide on install and set up BMW Standard Tools 2.12 on laptop.
BMW Standard Tools is a group of software distributed by BMW Group that contains several interoperating applications and drivers, including NCS Expert, WinKFP, NFS, Tool32 etc. Following are the free download and detailed installation instruction offered.
What you need to pay heed to before installing BMW Standard 2.12
If previous versions/attempts were installed, go to add/remove programs and remove those versions.
Ensure you have at least 15 GB free space on the C Drive, or virtual drive if using a Virtual Machine.
Determine whether your OS has 32 or 64 bit encryption before beginning the install. 4). Download your chassis DATEN by using the link contained within the “DATEN Link” text file. Install the program 7Zip to extract your DATEN download (http://www.7-zip.org/).
What you need before installing BMW Standard Tool
Software: BMW Standard Tools 2.12 (INPA, EDIABAS Toolset32, NCS-expert etc)
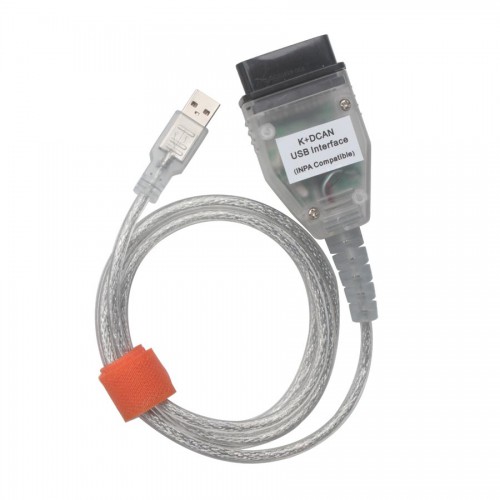
Hardware: BMW INPA K+DCAN cable, ENET (Ethernet to OBD) cable, BMW ICOM a2+b+c emulator
Where can you get the BMW Standard Tool?
What you need to get
Free download BMW Standard Tools V2.12 Software
Or get it in BMW ICOM Rheingold ISTA-D ISTA-P software HDD
Operating system: Win XP/Win 7
How to install BMW Standard Tool?
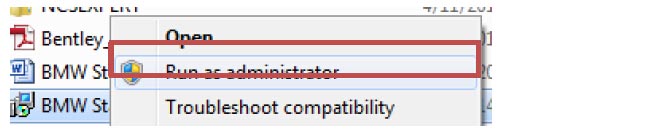
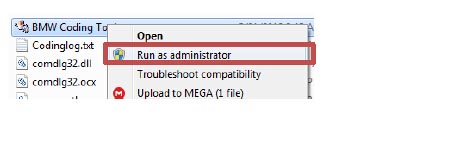
1.Right click on BMW Standard tools-212.exe and run as administrator.
- If installing on Windows 8 or 10, right click and select properties then compatibility tab.
- For Windows 7, Please select “Run this program in compatibility mode.
2.Click “Yes” when asked to allow the program to make changes to your computer.
3.Select “English”.
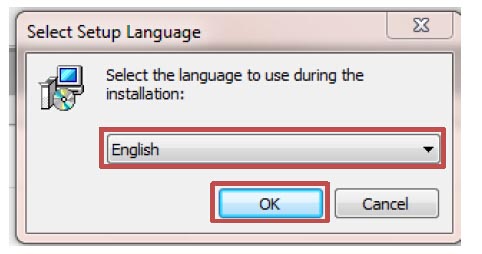
4.Select “Next”.

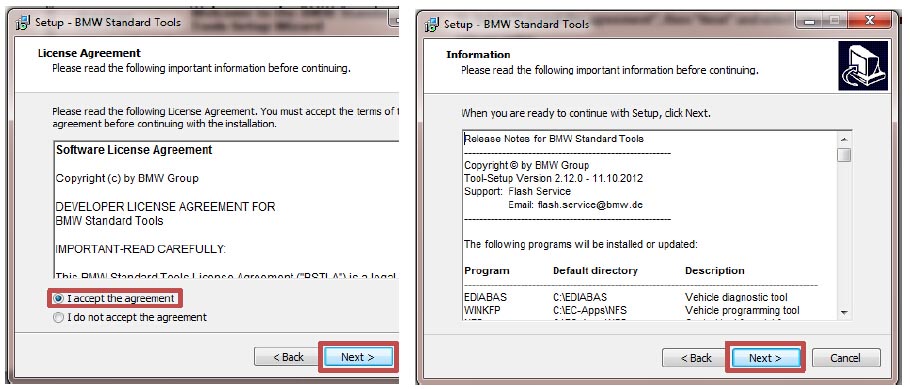
5.Select “I accept the agreement”→“Next”→“Next” when you’re done reading the release notes.
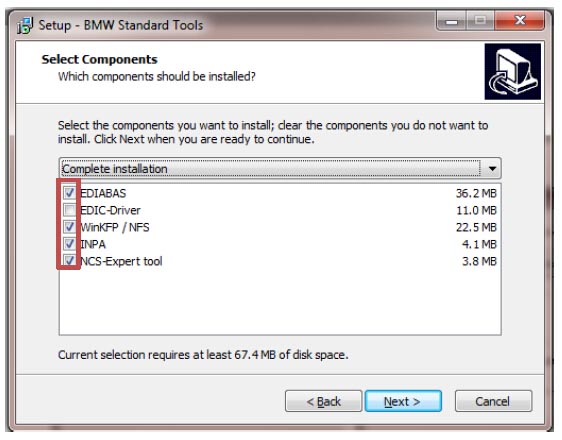
6.Accept the default install options (we’ll worry about the KDCAN drivers in a later step).
Select the default location for each of the programs being installed on next few screens.
7.Select the default Start Menu Folder by clicking “Next”.

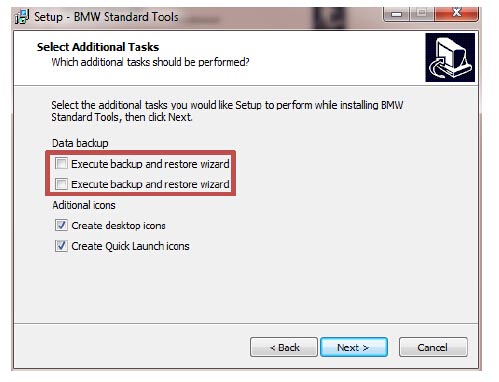
8.Uncheck both “Execute backup and restore wizard and click next.
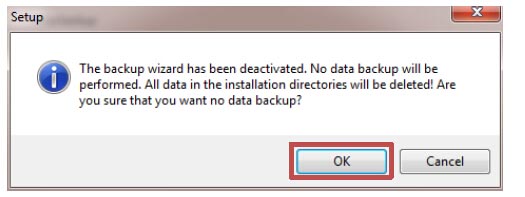
9.Select “Ok” when the message pops up.
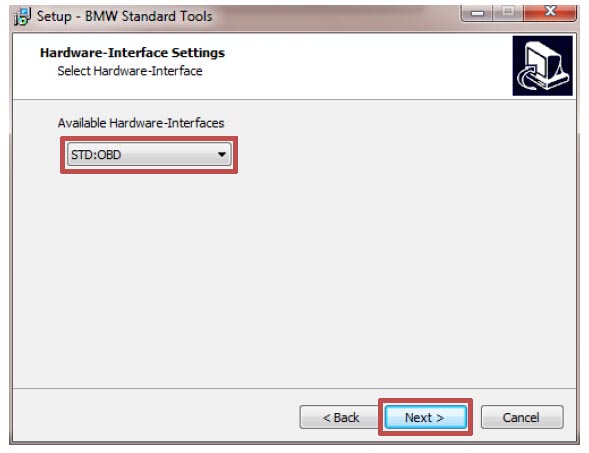
10.Select the default interface by clicking “Next”.
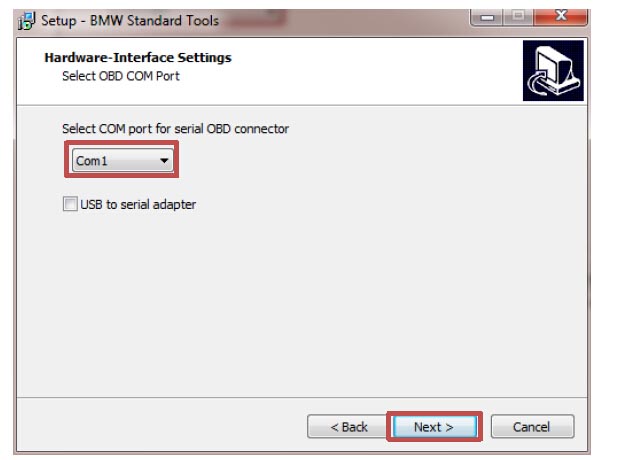
11.Select default Com Port (Com 1) by clicking next. We can change this later if need be.
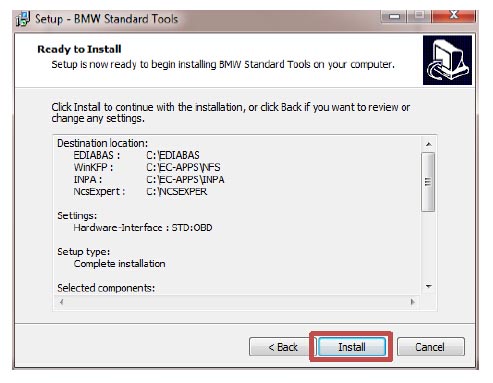
12.Click “Install”.
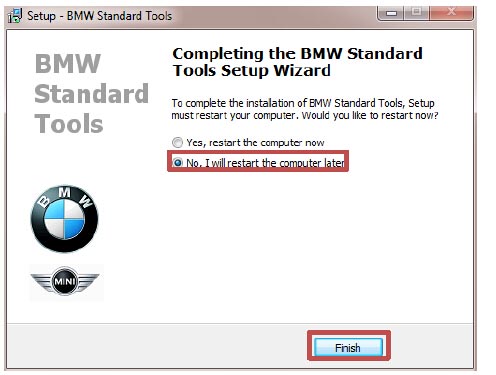
13.Select “No, I will restart the computer later” and click “Finish”. No need to do this, can use software without rebooting.
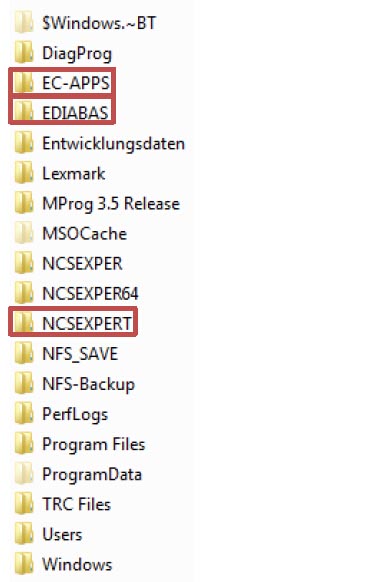
14.Select the 3 folders below and delete them. This install was primarily used to create all the environment variables and registry entries necessary to run these programs. Now, we’ll copy a pre-configured set up with English files and translations already in place, plus select which NCS Expert version you need to use (32 or 64 bit).
NOTE: You won’t have the NCSEXPER64 folder yet.
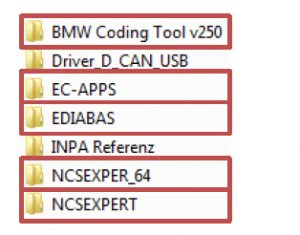
15.Select the downloaded folders below and copy them to your C: Drive.
NOTE:
- For 32 bit systems, select “NCSEXPERT”;
- For 64 bit systems, select “NCSEXPER_64”.
16.Run the BMW Coding Tool by right clicking and “Run as Administrator”, the select “Yes” when asked to allow this program to make changes to your computer.
17.We will define a few settings on this screen so that we can import the DATENs.
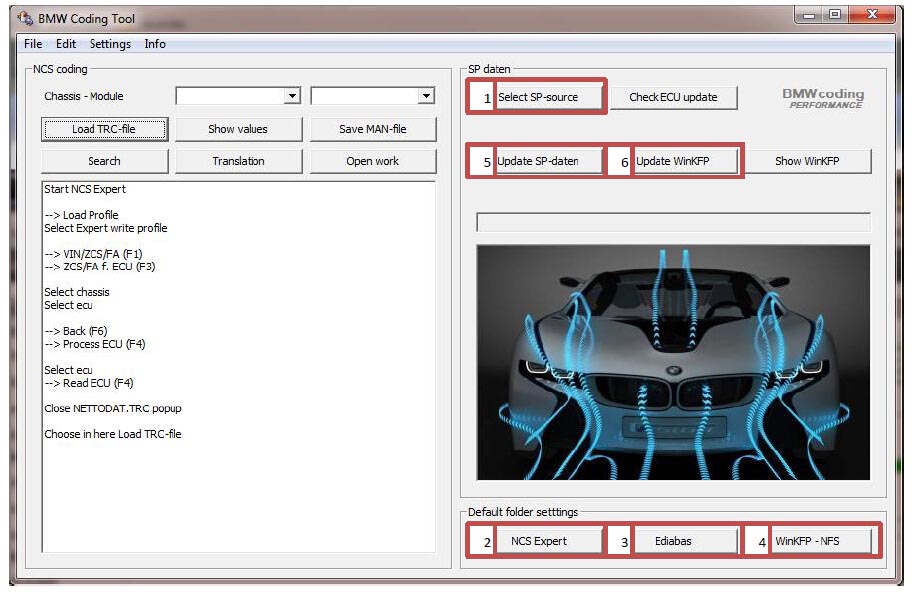
Button 1, Browse to the location where you downloaded your SP-DATEN and click the chassis folder (i.e., E89). The DATEN folder must not be a zipped file and must contain the following folders (cfgdat, data, daten, ecu, format, kmmData, sgdat, work). If not, this import process will not work.
Button 1, Browse to the location where you downloaded your SP-DATEN and click the chassis folder (i.e., E89). The DATEN folder must not be a zipped file and must contain the following folders (cfgdat, data, daten, ecu, format, kmmData, sgdat, work). If not, this import process will not work.
Button 2, Select the NCS Expert folder that you copied to your C: drive in step 15.
Button 3, Select the Ediabas folder that you copied to your C: drive in step 15.
Button 4, Select the EC-APPS\NFS folder that you copied to your C: drive in step 15.
Button 5, Click this button to begin the process of importing your DATEN. At this point, you’re able to begin coding and utilizing INPA for troubleshooting. You will only need to use button 6 if you’re planning on flashing updated software to any of your modules.
Button 6, Click this button to import the files required to update the software on your modules. Depending on your chassis, this will appear to freeze at times while copying CI*** files/folders. This is due to the copying of large files that’s utilized to flash your CIC.
At this point, you’re software is completely set up for coding and/or flashing. We will move to the next step of configuring your KDCAN cable drivers.
nNOTE: If the program displays an error when attempting to select the default folders, ensure you have these folders on your C:\ drive (if not, create it as an empty folder):
- C:\EC-APPS\INPA = BIN, CFGDAT, DEMO, DOKU, english, english.met, HELP, PRT, SGDAT, source
- C:\EC-APPS\NFS = BATCH, BIN, CFGDAT, DATA, DOKU, FORMAT, KMMDAT, SGDAT, TRACE, WORK
- C:\EDIABAS = API, BIN, DOKU, ECU, HARDWARE, HELP, SIM, TRACE, TUTORIAL•C:\NCSEXPER = BIN, CFGDAT, DATEN, PFL, SGDAT, STDAT, TAB, VERPLATZ, WORK
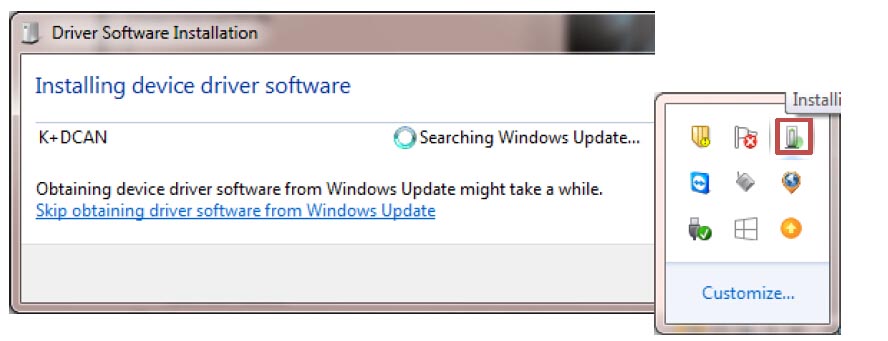
18.Once you plug up the KDCAN to your laptop, you should see this window. If not, go the lower right of the screen next to clock and look for this icon, click on it to bring up the window.
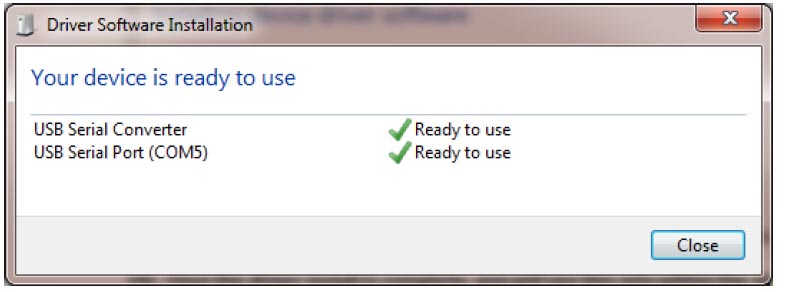
19.Once the driver install is complete, you will see this info within the window.
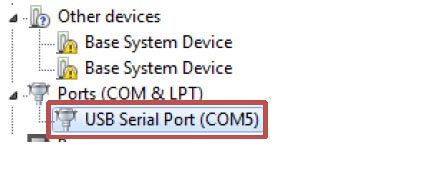
20.Go to the start menu and type in “Device Manager”. There are several ways to bring up Device Manager, depending on your Operating System version. You should see “USB Serial Port (COMX)”. We will now modify the driver to the proper settings by double clicking device.
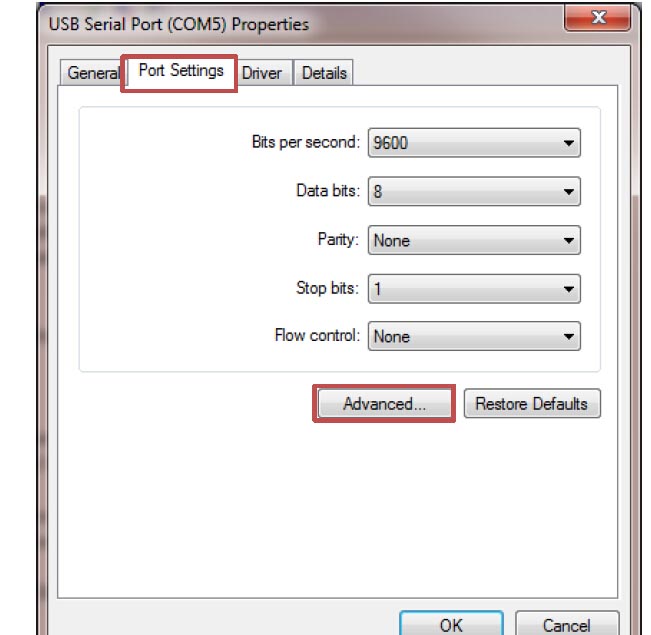
21.Click on the “Port Settings” tab, then “Advanced”.
22.Change the Com Port Number and Latency to 1, then click “Ok”.
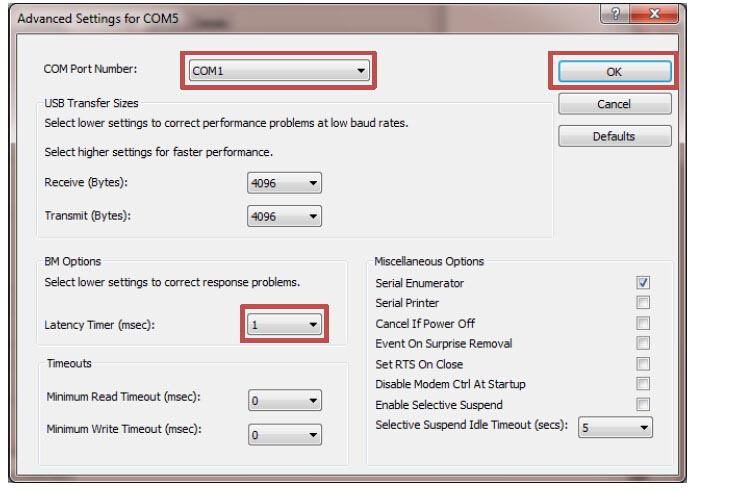
23.Click “Ok”, then “Ok” again, you should notice your Com Port changed to 1. If for some reason you can’t assign Com Port 1, you can modify the OBD.ini file in C:EDIABAS\Bin directory. Change the info in the second line (Port=Com1) to the Com Port assigned in the previous step, save and close the OBD.ini file.
24.At this point, you’re set up and ready to connect to your BMW.
NOTES:
1). Coding instructions are included on the BMW Coding Tool mainscreen
2). To import multiple versions of DATENs, use buttons 1, 5, and 6 from Step 17 for each chassis you want to utilize.
3). NCS Profiles: “CNCoding” – Basic Coding/changing values; “ExpertMode” – Default Coding/resetting module to factory defaults based on VO.
How to set up BMW Standard Tools 2.12?
Step 1: Download BMW Standard Tools 2.12
Download here and install follow system prompts:
http://www.mediafire.com/download/qldyddn48ffzrwn/BMW+Standard+Tools+2.12.rar
Step 2: Download and install INPA
http://www.maxdown.org/download.php?file=BMW%20Inpa/Ediabas%20v5.06&host=b
Step 3: Download and install NCS Expert ENG
Download NCS-Expert software here and install
http://www.mediafire.com/download/en2xcszq46vaipm/NCSEXPER32_ENG.zip
Step 4: Download and configure INPA K+DCAN cable
Make sure your EDIABAS should already be configured to STD:OBD for use with INPA
cable. Download EDIABAS configurator here:
http://www.mediafire.com/download/x1r66eesv14lx88/ediabas+konfigurator2.0.0.exe
This tool (in C:\EDIABAS\Ediabas-Konfigurator folder) allows
you to easily change the ediabas.ini to your desired interface. So if you are
switching from INPA to E-Sys you could use this to switch from STD:OBD to ENET.
Set COM port for INPA cable
Connect the INPA DCAN cable with PC Install device deriver Come to My Computer>>Device Manager>>Ports (COM&LPT)
In this case it’s COM5. We need to change this in the obd.ini file located
in the c:\ediabas\bin folder.
Right click on your INPA cable driver for example mine is labeled “USB Serial Port” and click on properties. Now in the property window click on the advanced tab.
Now every driver is different but the important part is the settings such as latency timer and received and transmit bytes. See pic bellow for the ideal settings. You may also change the COM port number here as well for tutorial I left it at 5. Once your changes are done we can proceed by clicking OK to accept the changes. No close all windows to return to the desktop.
Step 5: Change the OBD
Browse to C:\EDIABAS\BIN and find file obd.ini and
open it with an editor (e.g Notepad)
First 3 lines will look like this…
[OBD]
Port=Com1
Hardware=USB
Need to change the Port to reflect our INPA cable which in our case
is COM port 5. So change it to look like this…
[OBD]
Port=Com5
Hardware=USB
When done click File -> Save and exit
NOTE: Remember which USB port you connected your cable to as plugging it into a different USB port will allocate the INPA cable to a different COM port.
Neither tool will see the cable until the original USB port is used again or changed in device manager and obd.ini as mentioned above.
Now to test if your cable installed correctly.
Plug it into the vehicle’s OBD port and openINPA.
Step 6: SPDATEN Files
Download and install SPDaten files (always recommend the latest) in this case it is 50.2 until I finish zipping and upload SPDatens 51.0 and upload it to share. (Follow the instructions provided at the end of the blog labeled “How to start WinKFP” which will explain how to import the SPDaten files to WinKFP)
Once downloaded you can now
**EDITED 10-12-2013**
For NCSExpert to install or update the daten files, copy the files from SP-daten-E##\daten to
the C:\NCSEXPER\DATEN\E##\ (where E## is whatever chassis you’re
updating). You will also want to copy the files from SP-daten-E##\SGDAT to C:\NCSEXPER\SGDAT (they’re not separated into different chassis in NCS Expert, so you just want to copy and paste everything to that directory. Overwrite everything it asks about). Then copy the files from SP-daten-E##\ECU to C:\EDIABAS\ECU
After copying the daten files to
c:\NCSEXPER\DATEN\E## copy the following files to the following locations:
copy C:\NCSEXPER\DATEN\E##\*.000
C:\NCSEXPER\DATEN\
copy C:\NCSEXPER\DATEN\E##\*.DAT C:\NCSEXPER\DATEN\
copy C:\NCSEXPER\DATEN\E##\*.ASC C:\NCSEXPER\DATEN\
PS: How to start WinKFP?
1.Install WinKFP and come to direction
- After installation the directory (Drive letter):\EC-APPS\NFS\SGDAT contains file CABI.h only, and doesn’t contains files, required for working.
- Mount the Progman disk in virtual drive (or insert in usual DVD-drive), extract all files SP-daten-Exx.rar from directory (Drive letter):\CIP-Installer\bin, each one in its own directory.
(You must get directories like SP-daten-Exx) - Now copy all *.IPO files from every directory (Drive letter):\SP-daten-Exx\sgdat to directory (Drive letter):\EC-APPS\NFS\SGDAT.
For this purpose better use Total Commander, it allows to overwrite elder files
with newest. This directory now looks like this: - In the same way refresh directory (Drive letter):\EDIABAS\Ecu with files taken from (Drive letter):\SP-daten-Exx\ecu 6.
Run WinKFP - Run WinKFP software
- Choose “Import/Export – Import – Assemly line data” and import all data needed from directories (Drive letter):\SD-daten-Exx\DATA Details how to import assembly line data are given
in official manual for WinKFP - After importing the data, copy all files from directory (Drive letter):\SD datenE70\DATA\gdaten to directory (Drive letter):\EC-APPS\NFS\DATA\GDATEN, overwriting all existing files.
Note: If you use Progman v.30 for updating WinKFP, it has error in file \GDATEN\Sgidc.as2. Simply open this file with Notepad and delete line 165.
WinKFP is ready for programming
Relate Hot BMW Scanner products:
1.
ICOM A2+B+C Diagnostic & Programming Tool for BMW and MINI Without Software

2.
INPA K+DCAN Interface for BMW Full OBD2 Diagnostic Tool with FT232RL Chip with Switch
3.
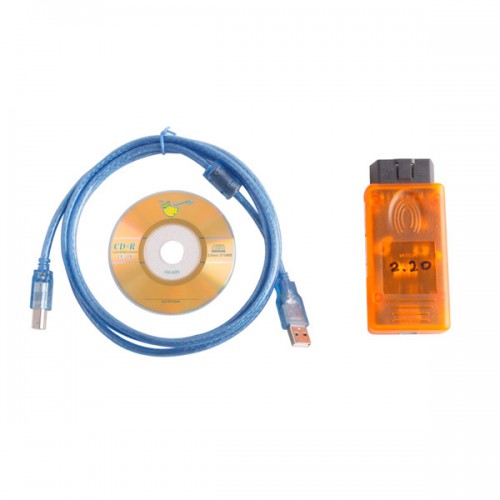
Best Offer Scanner V2.20 K+DCAN for BMW
Professional Diagnostic Solution & Service Supplier


Leave A Comment